Description
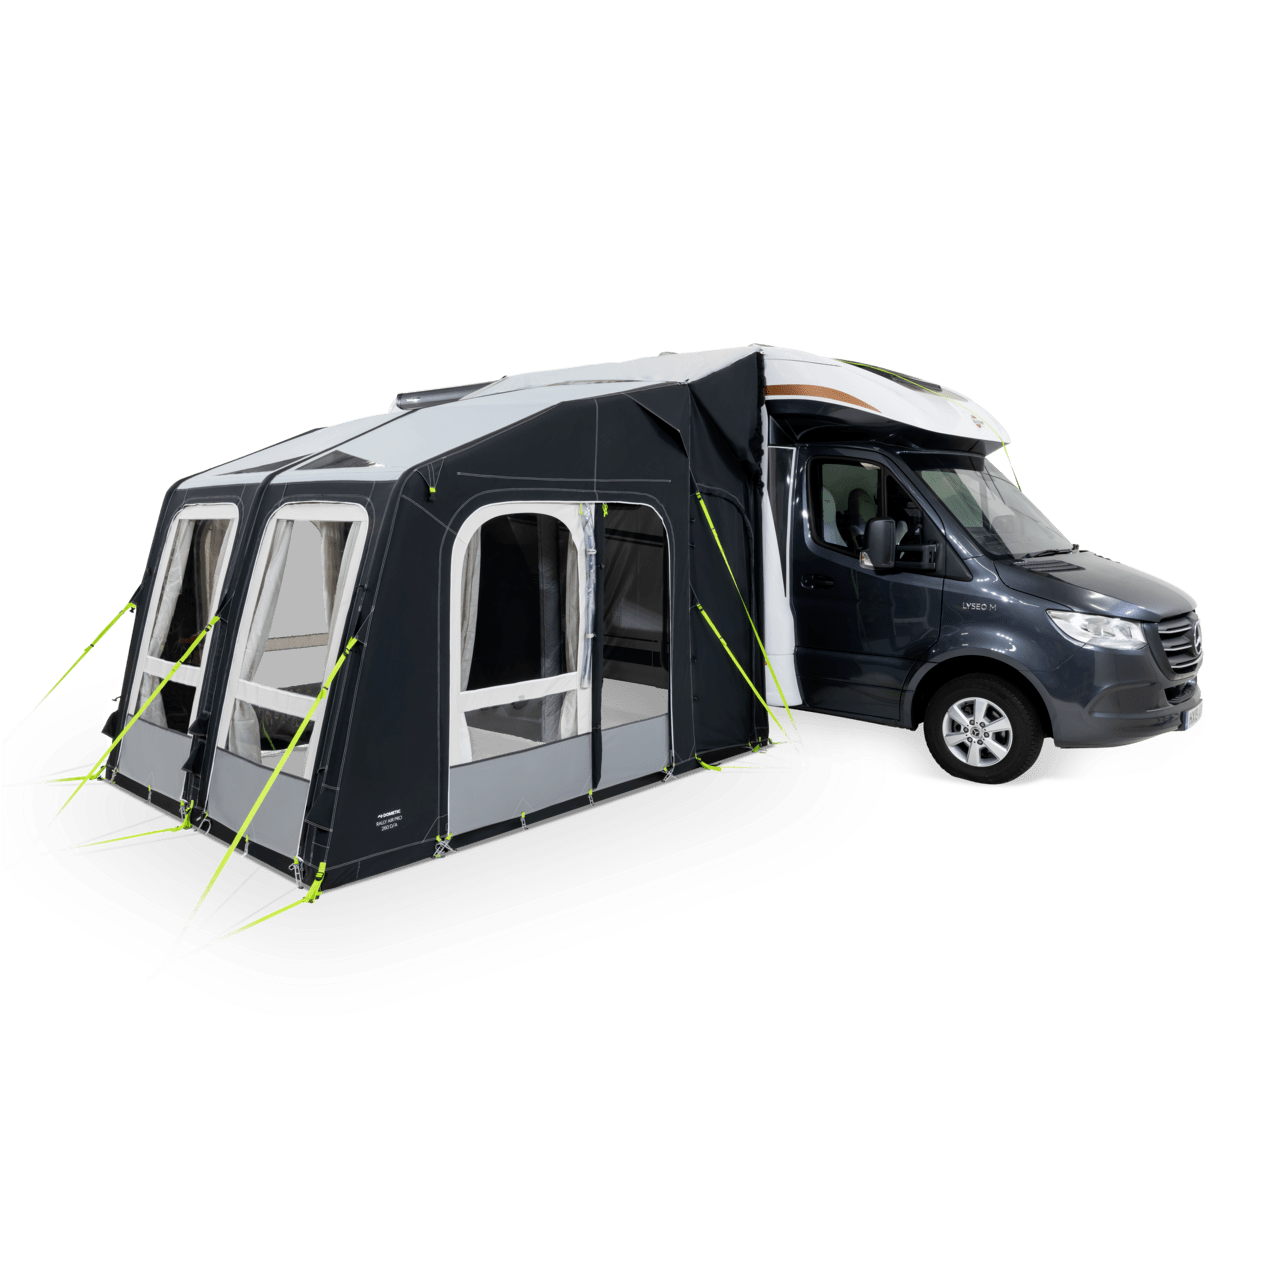
- Single Point Inflation Air Frame technology ensures a strong structure and easy set up
- Tough yet lightweight Weathershield™ Pro material is proven in diverse environments
- Drive-away freestanding awning
Specifications
SKU: 9120001137
| Model | RallyAirProDA |
|---|---|
| Scope of delivery | 1 awning; 2 side walls; 2 front walls; 1 curtain set; 1 2.2L pump; 3 6m connection straps; 2 storm straps; 1 peg pack; 1 manual; 2 carry bags |
| Product Description | Inflatable drive-away awning, 2.6 m width |
| Dimensions product depth, [mm] | 2500 |
|---|---|
| Dimensions product height, [mm] | 3000 |
| Dimensions product width, [mm] | 2600 |
| Connection height min, [cm] | 220 |
| Connection height max, [cm] | 300 |
| Net weight, [kg] | 31.30 |
| Vehicle Type | Motorhome |
|---|---|
| Frame Type | Inflatable |
| Parcel weight, [kg] | 34.96 |
|---|---|
| Parcel dimensions | 99 x 56 x 31 cm, 26.1 kg + 99 x 13 x 33 cm, 8.86 kg |
Highlights
Single Point Inflation
Single Point Inflation awnings inflate from just one external inflation point
Apex Ventilation
Ventilation improves comfort by increasing air circulation and reducing condensation
Zip-out Front Panels
Front panels can be zipped out to reduce weight and to open the awning up
Weathershield™ Pro
Weathershield™ Pro double coated polyester fabric
Floor Plan
Generous dimensions maximize the liveable space of your pitch
Fully waterproof
Tested to withstand 200 liters of water per hour per sqm, which exceeds London's average of 70 liters per hour in its wettest month
Roam free with Dometic
Adventure further, stay for longer, and thrive wherever you pitch-up with a drive-away awning from Dometic. The Rally AIR Pro 260 DA has been designed from top to bottom to support your touring adventures. Quick to set-up and completely free-standing, simply detach your awning from your vehicle and leave it to reserve your pitch whilst you explore the local area or drive to a nearby beauty spot.
11 questions
Guy Line Method (Recommended)
Throw the guy lines, attached to the top corners of the tunnel, over the vehicle and either peg down on the other side or tie to the wheels
Unpeg to drive-away
Advantages
Greater tensioning of tunnel assisting with water run-off
Higher attachment point for better door clearance
Quicker to reattach upon return to your pitch
Keder Beading Method (optional accessory recommended)
Dometic drive-away awnings come with a 6mm keder beading sewn along the length of the rear tunnel
Attach directly to awning rail (if fitted) or channel of cassette awning
For vehicles without a rail fitted, a Kampa Limpet™ Drive-Away Kit or Magnetic Driveaway Kit can be used
When using a drive-away kit, remove the figure-of-8 profile to drive-away
Velcro Loops Method
For vehicles fitted with roof rails.
Attach the Velcro straps, fitted along the top edge of the tunnel, around the roof rail.
Undo Velcro to drive-away.
Pole & Clamp Method (optional accessory required)
Requires gutter to run the length of the awning tunnel
Simply thread pole into sleeve on tunnel edge
Rest the pole in gutter and secure with clamps
Remove clamps and pole from gutter to drive-away
Guy Line Method (Recommended)
Throw the guy lines, attached to the top corners of the tunnel, over the vehicle and either peg down on the other side or tie to the wheels
Higher attachment point for better door clearance
Quicker to reattach upon return to your pitch
Keder Beading Method (optional accessory recommended)
Dometic drive-away awnings come with a 6mm keder beading sewn along the length of the rear tunnel
Attach directly to awning rail (if fitted) or channel of cassette awning
For vehicles without a rail fitted, a Kampa Limpet™ Drive-Away Kit or Magnetic Driveaway Kit can be used
When using a drive-away kit, remove the figure-of-8 profile to drive-away
Velcro Loops Method
For vehicles fitted with roof rails.
Attach the Velcro straps, fitted along the top edge of the tunnel, around the roof rail.
Undo Velcro to drive-away.
Pole & Clamp Method (optional accessory required)
Requires gutter to run the length of the awning tunnel
Simply thread pole into sleeve on tunnel edge
Rest the pole in gutter and secure with clamps
Remove clamps and pole from gutter to drive-away
Under certain conditions, all awnings will suffer from internal condensation.
Condensation is created by moist warm air coming into contact with a cool surface. This moisture condenses creating water. Depending upon the conditions, condensation could be quite severe and is commonly mistaken for leaking, especially as it can run down the inside of the roof and drip off ties, tapes and other internal fittings. Most condensation occurs in the off-season – early Spring, Autumn, Winter.
Primary causes of condensation are:
Moisture in the ground
Moisture in the air
The weather
People sleeping in the awning
An adult can easily produce 1L of water over 12 hours through breathing
Heaters being used in the awning
Cooking in the awning
Exhaust vents from the vehicle into the awning
Wet items – coats, jackets, towels or even wet dogs
Reduce condensation by:
Avoiding pitches on wet ground
Maintaining good ventilation
Turning off heaters used in the awning
Not storing wet items inside the awning
Roof linings are also available for many of our awnings, this accessory helps reduce condensation by regulating the temperature inside the awning, catching any drips that fall from the roof and allowing the water to dissipate when conditions improve.
Dometic awnings using Weathershield™ All-Season material will experience reduced condensation, this is a breathable material more suited to out of season caravanning.
Pole spring links are considered a consumable part and can easily be replaced if broken. They are typically broken by dropping/dragging the poles and general wear and tear.
To purchase replacement pole springs, we recommend contacting a Dometic authorised repair centre or your supplying retailer.
Awning zips should be treated with care, use two hands to close and open and never tread on them. Never force a zip. The awning should always be pegged with the zips closed to ensure they will close correctly and without force. Panels can be crossed pegged to avoid excess stress on the zip.
If your zips are stiff or sticking, apply silicone spray to aid with lubrication.
We use a premium window material designed to give the clearest view out. Cloudy marks can sometimes form on the window material if packed slightly damp, this can be resolved by tensioning the awning and heat from the sun when next setup. Deeper marks, such as zip marks and folds, can be improved by applying heat directly to the window with a hair dryer.
The composition of the material means that there may be some impressions in the window, particularly after storage and folding. These are not faults. We suggest, particularly in cold conditions, and certainly in sub-zero temperatures, that the awning is thoroughly warmed up before setting up.
Our awning windows have been tested to -20°C but it is essential that the windows are prewarmed before unfolding. Before unfolding the windows can be warmed up by bringing the awning into a warm vehicle, or by applying heat directly to the windows with a hair dryer or similar appliance.
Repairs to the awning flysheet should be made by a Dometic authorized repair centre or your supplying retailer. Repairs and alterations made by an unauthorized company may invalidate the guarantee.
Dometic recommend that Super Hydrophobic Spray is applied to the flysheet material on an annual basis. Not only will this ensure that the awning remains waterproof, it will also create an extra layer of resistance to UV damage, prolonging the life of an awning.
If any seam taping has been damaged or come loose, we would recommend it is repaired using Seam Sealant. This is easily applied and results in a colorless and flexible repair.
An inflatable awning is the perfect accessory for your caravan. Whether it's a place to lose your wet coat and muddy shoes, an extra sleeping area for guests, or a luxurious extension of your caravan's living space, a Kampa Dometic awning is key to many happy vacations and breaks away.
Simply print this handy guide out, fill in your caravan's measurements and visit your local Dometic awning stockist to find the perfect awning for your van.
Dometic Caravan Awnings
Attach by simply sliding the keder into your caravan's awning rail.
A: The height to the awning rail from the ground. Measure this to ensure your vehicle attachment height is within the tolerances our caravan awnings allow for. Dometic awnings are suitable for caravans with attachment heights between 235-250cm.
Note: If your A measurement is greater than 250cm consider one of our static motorhome awnings, available in a range of heights up to 310cm.
B: The length of the straight section of awning rail. This measurement determines which size awning you can purchase. Dometic awnings are not suitable for curved or bent sections of awning rail. E.g. An Ace AIR Pro 400 requires a minimum of 400cm of straight awning rail.
C: The distance between the end of the straight section of awning rail and the edge of the door. Ensure you have enough space to allow for the rear sealing pad of the of your awning to fit between the edge of the door and the end of the straight section of awning rail. We recommend at least 25cm.
Note: The awning can cross a window, whilst it may obstruct usage it will not damage the window or effect the awning's performance.
Dometic caravan, motorhome, campervan and SUV awnings are covered by a comprehensive guarantee. We offer an in-depth Customer Services function that can be accessed through your supplying retailer. Warranty claims and enquiries should be directed to the supplying retailer.
Warranty periods (unless otherwise stated):
Inflatable frame - 2 years parts
Poled frame (steel and aluminium) - 1 year parts
Awning fabric - 1 year
Other components - 1 year
Accessories - 1 year
The guarantee covers manufacturing faults, materials and parts. All claims must be made via the supplying retailer.
What's not covered?
Wear and tear
UV degradation
Misuse
Accidental damage
Storm damage
Condensation
Permanent, seasonal, semi-permanent or commercial use. This excludes All-Season models, these have been designed for use on seasonal pitches.
Warranty Repairs:
Awning repairs should only be made by a company recommended by Dometic or the supplying retailer. Unauthorised repairs and/or alterations may invalidate the warranty.
Dirty awnings can be washed using clean water and a soft brush. Do not scrub and never use detergents.
If this does not clean the awning, we recommend applying awning cleaner, this is available from your supplying retailer or authorized repair centre. It is always best to first test a cleaning product on a part of the awning you cannot see in case of any adverse effects the cleaner may cause.
Tree sap should be removed as soon as possible to prevent permanent damage to the material.
Occasionally, the connection between the connecting hoses and the isolation valves can work themselves loose. Each awning is fully inflated and tested before leaving our factory but the repeated folding, transporting, unfolding and setting up process can sometimes pull on the connection causing it to loosen. This is not a fault with the awning but a maintenance procedure that may have to be performed from time to time.
If you suspect that the awning may be leaking some air then it is more than likely that one, or more of the connections will need to be adjusted. Follow this simple procedure:
Inflate the awning fully.
Go inside the awning and close all of the isolation valves.
Wait for a period of time and recheck the pressure in all the AirPoles by squeezing the poles. If an AirPole has lost pressure, then the seal between one of the connecting hoses and the isolation valves may have become loose.
Identify the affected AirPole and the adjacent isolation valves, there may be more than one valve. Keep the isolation valve closed and fully unscrew the collar on the deflated AirPole side of the valve. This will reveal the push-fit element of the valve and the conical washer.
Ensure that the connecting hose is fully pushed onto the valve.
Slide the conical washer up towards the screw thread on the valve and then screw the collar onto the valve. The washer is conical, and the smaller diameter side must face towards the collar. Screw hand tight then turn a further half turn with the supplied spanner. Over-tightening will not improve and may adversely affect the seal.
Repeat for any other isolation valves on the AirPole.
Open all the isolation valves inside the awning, the AirPole will refill with air. Inflate the awning to the correct pressure.